Learning to Machine Knit

November 23, 2016

I learnt how to machine knit this week, in hope that this would help me further develop sampling for my fashion project. David taught me the basics of domestic machine knitting and the taught me the duibed knitting. I found this so difficult and time consuming but I am happy to continue to learn this process, I started then creating windows of empty space by casting off then knitting then casting on again.

I started using the domestic machine further and using white polyester yarn so that I could print on top of this.

I am unsure whether this process is worth my time and whether I should continue doing this, I want to create the empty areas and negative space in knit or fabric. I could try this further by using other cut out processes like laser cutting and bonding other materials together and cutting out areas or printing on top?


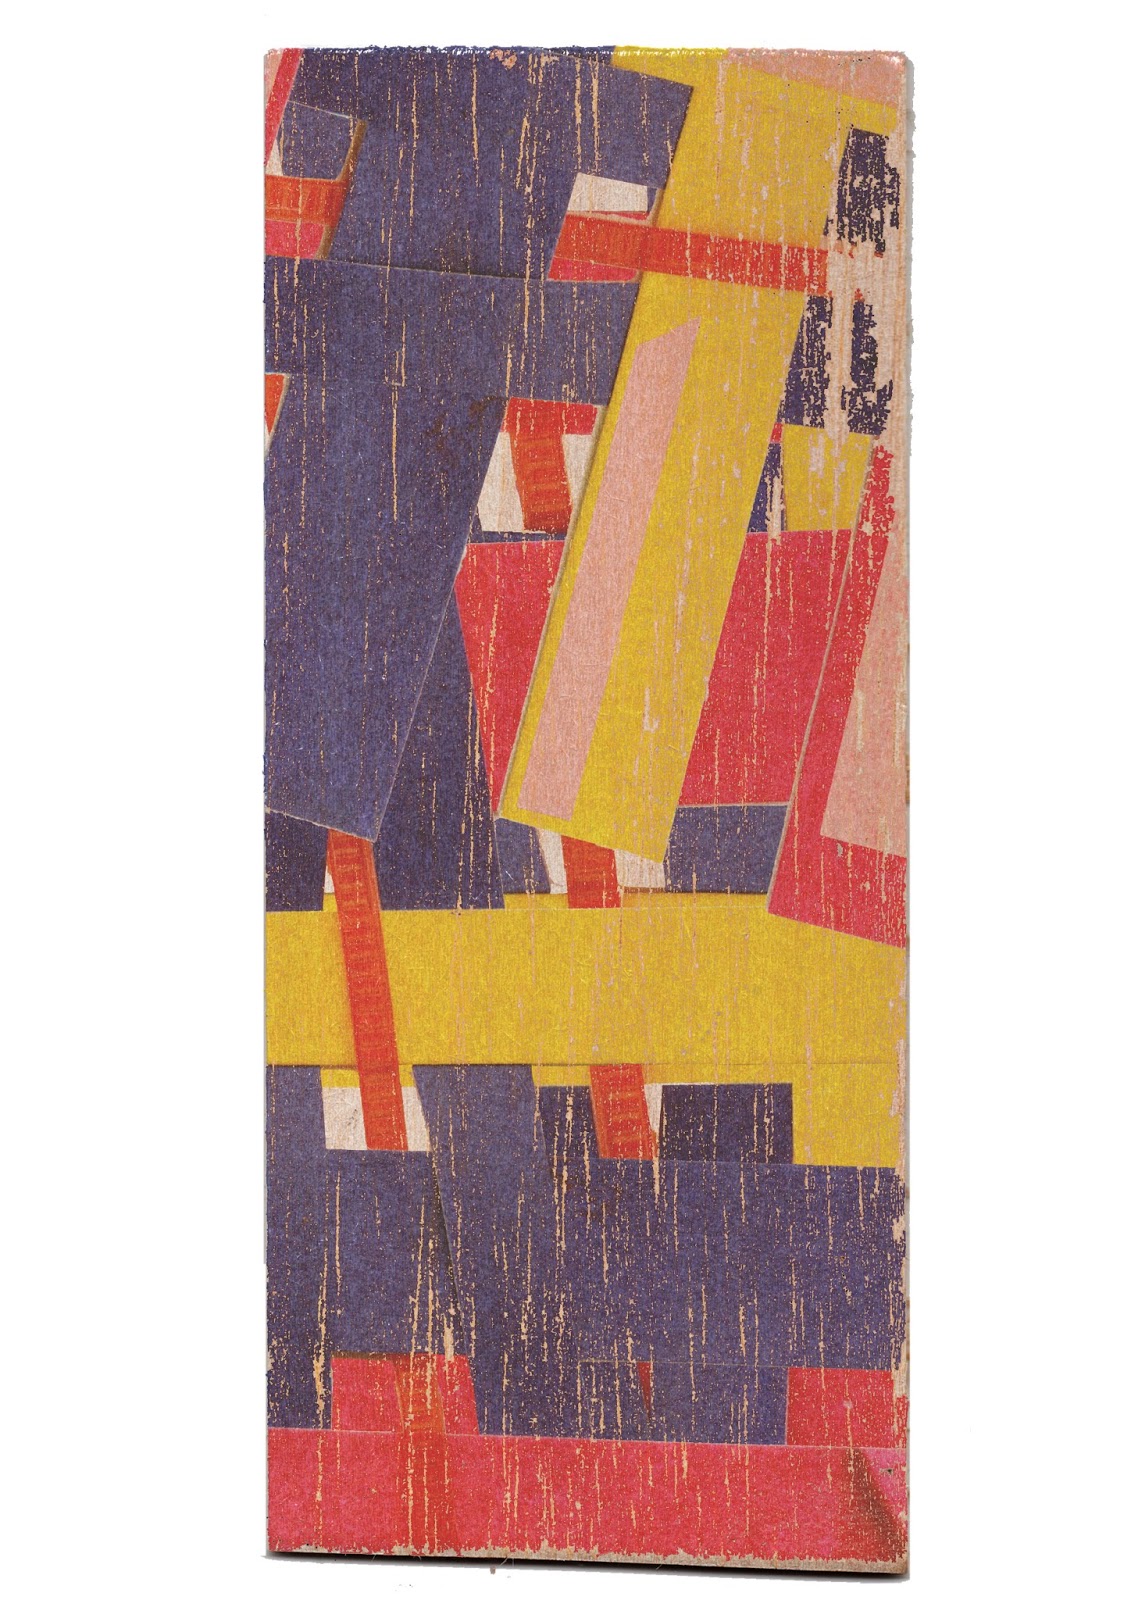
initial inspiration for this idea

my sampling using fine wool on the dubbed

casting off areas to create negative space


CRAFTCO Opportunity Thoughts

November 21, 2016

After volunteering for Craft Co, we had our initial meeting and have been thinking about how this could co-inside with my current projects. I need to make a quality product which is unique and intriguing as well as showing my ability, skills and innovation. I want this to be an opportunity to test ideas and get my name out there. I am initially thinking of using my wooden planks as an idea and some how making these into jewellery, coasters or tiles. I was thinking maybe the print on these items could tesselate and match up or maybe not match up? A problem I might come across is fitting this into my schedule as I did not initially fit this in to my timetable so I need to find out how make time for this project. I am excited about this opportunity and I think it will beneficial and link with my research report.


BA3a

BUSY WEEKEND

November 13, 2016

I have had such a hectic weekend, doing uni work almost every spare minute I have had. On friday I spent the afternoon indigo dyeing some tote bags that I aim to sell at the Christmas Market- which didn't go too successfully. So on Saturday I spent a little while trying to decide what to do with them, I have ironed the ones that worked better but some were very pale, which means I will have to re dye them, meaning I will lose the shibori pattern!! I plan to make some labels (to patch on the front) using sublimation this week in preparation for Thursday where I hand them in. I have spent all of today (Sunday) trying to get through some of my research report, which again, hasn't been particularly successful. I am finding it so overwhelming, as I know how big it has to be at the end. Because I have such a large amount of research, it is so difficult to be selective and edit the most accurate and relevant information which I can analyse well. Using Pat Francis' advice, I have been trying to WIDEL but this is hard when I have goals to meet and practical work to do too!
I have been drawing for the fashion project, mainly my photographing collections of objects then editing them using photoshop to develop them creating more "drawings". From the sticker stencil idea from Nick, I have been using spray paint over objects to create negative space drawings. I quite like this concept and have further developed this by printing out the developed photographs and used a craft knife to cut out the spaces, leaving the negative, outer space behind. I have been using both parts of the cut out creating negative and positive space when spray painting over them. Tomorrow morning I am booked into the print room, to play with resist on screen with some stencil thats i have created using acetate and card.
This evening I have been researching into colour palettes, on WGSN, tumblr and instagram to create a solid selection of colour palettes to help me tomorrow in the print room. I plan to print mainly on papers but I will use some fabrics too- I am thinking about using the CAD embroider soon to develop my designs in to samples. This might not be the path I choose but its an idea- especially after attending the advanced CAD workshop the other day.

BA3a

Fashion Project Ideas

November 07, 2016

After mind mapping and researching this weekend I had some initial ideas which evolved around the idea of found objects as I touched on this in my interior project and wanted to take this futher. I had a little look in the library and found and incredible book called Everything We Touch by Paula Zuccotti. IT IS AMAZING. The whole concept is brilliant and truly intriguing. I think I am intrigued by it because it explores humans in a specific way just by looking at their objects which gives a small insight into their everyday life, it feels like you understand and know the person just by looking at the gorgeous photo of the objects laid on the white back drop. The photos are taken with so much care and are considered well which has inspired me to do a similar thing to get my fashion project started.
In the group crit today, Nick also liked the book and made me realise the different ways the objects were photographed. Some are in a grid format, some in a more collaged fashion. I love how all the objects are photographed together in one go which gives you a bigger picture and a different insight compared to if they were photographed individually.
Nick and the others also seemed excited about my initial ideas. He mentioned about artists who dismantle and crush found objects and things the only exist in the moment? He also said about photographing my personal items together in one go but also trying to photograph then individually. I was unsure how I would transfer these drawings (or photographs) into designs for fashion. Nick mentioned about photographing my clothes against a white background then printing these onto another piece of clothing and skewing it slightly so it was shifted out of place, which I thought was interesting. I could tape my objects to walls or tape outfits onto walls or even project an outfit onto somebody. Which could be interesting for final designs. I said that I wanted to tell a narrative in my work- a bit like the book I was inspired by. Some peers in the group mentioned about asking people about their belongings or even asking a certain amount of people what they had in their pockets. Nick mentioned that this could narrow down the path of my project which I completely understood when he said this. As most people don't have important, meaningful objects in their pockets these days, so I would end up with snotty tissues, pennies and old receipts. I still want to develop the idea of getting others involved (as almost a human experiment), I just need to think further on this idea.
To get me started though I will begin photographing my personal objects in a taxonomy style, looking at different combinations of objects creating collections of colour, material and function. Nick also mentioned about using things as stencils as resist (like the bi product of a sticker book) and using spray paint to get the negative b. I will use this concept and try to think of doing this with objects that I have.


BA3a

Further Context and Final Design Thoughts

November 04, 2016

Its time to gather my designs/drawings/sampling and think about designing the final pieces. I have many mini designs on wood and I have started manipulating imagery/collage/drawing/material experimentation on photoshop and overlaying these on a scan of the wood I was using, to quickly visualise the design on the wood. I am not planning on using the wood as a final material. I was going to use the wood as part of the design as the texture and colour pay off works really well, I plan to apply this to floor and wall vinyl for the final samples. I  will show this by presenting the design on paper then suggesting the vinyl that it would be used on, in a hostel context. I need to think about how I present my designs- do I have the floor and wall design as one whole design with spaces of plain wood/design in between to break up the design and pattern so it sits better in situ? I have done some visual research to help me decide with this (below). I think hints of the design and pattern would work really well as a statement floor and wall design piece- almost like an installation but on the wall and floor so it has more purpose.


I have printed out lots small wood designs to then build up a whole floor and wall design physically rather than using photoshop, just so I can get a feel of how this would look. I have been photographing them but I could stick them down or even put the design against different flooring and walls to see how they would look in context. I much prefer being hands on and my work having a handmade look which I guess links to my research report. I try my best to use little digital process because I like the unique bespoke concept of handmade work. However, digital process doesn't mean that they won't be bespoke and have handmade process too. My final designs will be digital but will be made up of many handmade processes to get to the final design.
I have also used the physical printed wood pieces to create larger parquet designs to see how they fit together- I quite like how some of the designs/colour carries on to the wooden piece next to it as it looks like they fit together well- I could intentionally do this on photoshop so the design flows but still has a patchwork vibe to it?

playing with overlaying and stacking wooden design- using the idea of collage

sublimated wood designs placed into to a "sort of" parquet design

using the printed wood to replicate a interior space- looking at floor and wall- continuous
sublimated wood designs placed into to a "sort of" parquet design

sublimated wood designs with melted tape placed into to a "sort of" parquet design

close up of small cut out of scans/photoshopped designs placed into to a "sort of" parquet design

close up of small cut out of scans/photoshopped designs placed into to a "sort of" parquet design

BA3a

Experimenting further with wood

October 27, 2016

Today I played around further with the wood from the uni shop as this has worked well previously with sublimation. I applied a paper weave (scanned and printed on the sublimation printer) to a small piece of wood, it turned out really well and I am so pleased with it. I applied skinny pieces of masking tape in stripes on the wood before printing to see if it would resist or do something interesting. The texture is still there despite it being a fairly flat print from the sublimation process, the masking tape really boosted the tonal value, the colour became more vivid on the masking tape therefore there was brighter vertical stripes of the printed weave which adds something interesting.


I spent the rest of today scanning in my other experimentations on wood, paper, fabric and woven polyester to play around with in photoshop. I have been trying to think further about context. After researching this week, I have found that one of the best options of flooring to use would be vinyl so I need to further look into this material and possibly try printing on this to see what would happen, as well as creating a suitable digital print of my combined textural compositions. Furthermore, I applied the wooden samples to the floor and photographed them as well as arranging the compositions and angle of them to replicate the parquet floor design. I also further developed this idea by using photoshop to 'sort of' repeat the wooden samples to again, replicate the parquet design (suggested by Will Crisp last week). I then realised I wanted a "patchwork" of my designs onto the floor, so I used the power of photoshop to apply some designs from drawings, prints, weaves and "object collages" to overlay this on to some scanned in wood and then play around with them physically after cutting them out.

I need to consider a few more things and ensure that I get this project fairly finished in the next couple of days to ensure I keep to my schedule and on top of the work load. 
Questions to ask myself:
How many final designs do I want or need?- check and read over project brief again
Do I need to further research into wall material and floor materials in hostels?
How do I contact various hostels to gain more research?


BA3a

Pat Francis workshop// thinking about Research Report

October 25, 2016

Pat Francis' session today was so inspiring, it made me think in different ways, doing things differently and making things easier for myself. Pat touched on how to reflect, refine and consider research differently, through ideas and metaphors which help you remember them. As we are creatives, she showed us 'hands on' ways to narrow down research and describe objects in a detailed manner.

What I will take from todays session:

  • Write it down, edit it later (WIDLE)- I find myself getting stuck and giving up easily, once in the flow of writing, Pat said that things will come more naturally and you will be able to explain what you mean after going back to it. "if you cant think of a word-leave a space and go back later"
  • Filter idea- start with broad ideas and points, filter it down to important ideas then reflect and dig deeper. (use a coffee filter as a physical example) 
  • Brick by brick- third year is the brick wall, take things brick by brick, whether it is a sentence per brick or a project per brick.Take one thing at a time!
  • Write a blurb if you get stuck. A blurb summarises your ideas which means it will get you back on track and make you realise what you are doing or what you want to be doing. (write this on a postcard as you can only fit a small amount on them)
  • Do the same thing, in a different style. Whether practical or written, if you get stuck, Pat said to do that one thing in a different way, whether it is writing it differently, applying it to a different context etc. The shape you see things in different ways. 
  • Brainstorm/list/break down/do bits/develop bits/join bits/re-order bits/do technical bits/proof read/finish. This handout was particularly handy, Pat stated that you didn't have do things in the order they would finally be in. She said to just write things down and refer to quotations and things will come together. She also finds it easier to the introduction at the end as many people find that daunting- which i do! She said to start off with a quotation and depict and unfold it as much as possible to then get a fully understanding. 
I will most definitely use these strategies and ideas in my research report to help me build up some of the content, realising I can jumble this around later in order for it to make sense is a reassuring idea. I will spend the rest of today analysing my research and selecting the most relevant quotations and findings. 

BA3a

printing on weaves

October 24, 2016

After weaving yesterday with the acrylic warp and polyester warp and the technical yarns for the weft, I have spent today sublimating on top of them with collaged scans of drawings, screen printed papers and woven materials. I found that the acrylic warp created a paler colour result, which looked interesting with a polyester or rubco yarn in the weft as it looked like small stitches and distorted the printed composition. I have documented my tests and findings in my technical file which has helped me remember the timings and techniques used with the heat press. I also found that the leftover sublimation paper had insetting patterns and textures on it (which translates well to my drawings). The weave acted a resist when removing the colour- I could purposely do this and use objects as a resist to create a more textured sublimated paper and then continue to scan this and enhance it. I plan to either use this interesting paper as a secondary print or even scan this in and digitally enhance it then print it again using sublimation to then apply again to fabric.

When heat pressing the weave with cables in the weft, it did move a lot and curl which made the weave turn into a melted curve shape which I didn't think was particularly strong. I could use the cables further by inserting them into paper weaves or other weaves to create an unconventional weave structure.


BA3a

weaving day

October 23, 2016

After finishing off the warp on my rigid heddle loom the other day and printing on some samples (fairly successfully) I thought I must warp it up again today with some polyester, so I can test out printing on them again with sublimation. It only took me a couple of hours to thread it up. I used some plain white polyester from fairfield yarns and also thought I would try out using some white acrylic yarn that I found in a charity shop. I thought I would try and put both of these warps on the loom in one go to see how that worked?

I wove some small samples using the rubco yarn, just to see how the colours turned out using sublimation collages, with the polyester warp. I also did the same for the pemotex yarn which is supposed to go rigid when heated- I tried this the other day and didn't have the desired effect but I aim to try this again this week with the polyester warp-it might pick up the dye nicely?
I experimented with the melted straws and cables to then re melt this week in the heat press to see what happens.
I managed to warp up and thread the loom and finish the whole warp in one whole sunday, which means I can cut it off to experiment and play with this week. 

BA3a

Reflection on today // lecture and print

October 20, 2016

Todays lecture from Amy Cogden was massively inspiring. She explained her process and journey from NUA in 2009 to where she is now, studying her PHD. It was so inspiring to hear her experiences and her problem solving and determination. Her interests with science and bacteria doesn't directly link to my current work but I do find it really exciting. I love her rigorous use of documentation and recording; it has reminded me to record well to get the best results. She also explained how she reflects and refines to ensure she doest go off on a tangent- which I think relates to me right now. I am experimenting and playing with materials and keep finding my self getting too excited about the results and not recording them accurately enough to repeat the process again.


Today I enhanced some scans of my screen printed papers on photoshop to be then sublimated printed. I aimed to use these to collage with to transfer onto fabric and also other materials.

I am going to weave this evening with polyester to then print on with the collaged papers.
Today, I also experimented with three different yarns I ordered from Hand Weavers. I also aim to weave with these tonight on my rigid heddle loom to then print on tomorrow with the papers I printed earlier. I look forward to see the results as the three yarns and very different properties, which link to my structural drawings.


BA3a

Melting/weaving/layering

October 19, 2016

From the ideas from Nicks session, I gathered lots materials, like straws, cable ties and cables. I also had some found plastic mesh (which I have started to weave into) and old cables and wires that I had collected  . The idea was to weave and collage these found materials, which linked with my theme of colour on the street. I experimented with melting cables and straws etc then weaving, weaving them beforehand then melting them together to fuse them. This proved fairly difficult, as the cables and straws moved around a lot when under the heat press. The cables, laid side by side, crossed over or woven together didn't look how I hoped as the colours became merged and slightly muddy. They also didn't lay flat, I tried to solve this by using tape and other things to hold it down flat but it still didn't look right. I thought the idea was there, having the melted plastic encased my the unmelted wire which gave it structure, I just need to think about how I can develop and transfer this idea by using a different technique or material.
The melting of straws worked well I just learnt to wait for them to cool in order for them to keep their shape. This makes me think that maybe I could remove them quickly from the heat to then shape them so they cooled and kept the shape I put them in? I collaged and melted the straws together more but realised that the colours were letting me down. I then bought some wider, clear straws, in the hope I could dye or print on these. Hopefully I can weave with these, then print on top, print on top or them or dye then and then weave them together? I could also think about melting them onto other found materials like wood or cables?


BA3a

Tutorial with Will

October 18, 2016

Todays tutorial with Will was super helpful! The ideas from yesterdays session have already developed and I think my context is finally sorted! Will gave my ideas to apply my designs to a Hostel context and designs for flooring. Which has made me think further about how I could sample! I plan to experiment widely with materials and material manipulation with colour and collage and then I plan to scan these in and digitally manipulate them applying them to some type of flooring? He gave me the idea of the parquet flooring which gives me an idea on how it will look- a structured textured patchwork floor! I need to research into the types of materials that would be suitable for a Hostel; thinking about durability, cleaning, longevity and design. I will be designing for St Christopher's Inn hostel, imagining that there is one in Norwich. I found that in the collab projects in year 2, setting myself a clear precise brief helped me so much, doing this will keep me on the right tracks and enable me to research fully into the context and materials. I need to email St Christoper's Inn and ask them some questions about material and design. I also need to speak to flooring companies.

I was thinking about also designing for the walls as well as the floors, maybe evening combining them so that the design doesn't stop at the floor and carries up on the wall? I need to find a material that is suitable for both. I also need to check how many final designs I need as this will change how I design things.

I have used the my first fabric collages (sublimation) to help me visuals the floor and wall concept, folding the fabric in half at a right angle, to make it look like a room. I find this an easy way to think about scale and design.

Will also suggested looking at Kinship on WGSN which looks at global and cultural patterns combined, he specifically said too look at the video! He advised to photography my collages of materials and drawings on different surfaces like old tile floors and use found, inappropriate objects to inform the photographs. He suggested to even recreate traditional flooring, like I said before- looking into parquet flooring and researching into different flooring designs. I like the idea I had of applying the floor to the wall so that the floor doesn't stop- I need to see how practical this will be in the hostel though!


[insert scan of pink sheet]


BA3a

Group Crit

October 17, 2016

Today was really useful to see others' work and see the different stages people were at. I described my troubles with sampling and context and felt like I was helped and given so many new ideas. I could combine weave and print (as I had already thought) but not necessarily just weave with yarn? I could use rubco yarn and search for more yarns that melt or do interesting things? Nick suggested to use wires and cables as well as other found yarn-like materials. Working with found wood was also suggested to me which I feel like I will take on board. This reminded me of a book I read in the library in the first week of this project about a lady who made "scrap quilts" out of colourful shapes of wood. This has made me think about creating collages and compositions of materials and drawings and photographing them in different ways.
I am still thinking about something in Airbnb for my context but not much was said about that- this is something I can speak to Will about tomorrow? I just want my context to be sort of public which links to travel and hospitality.


BA3a

Sublimation printing can be experimental

October 14, 2016

Knowing I had to move my work further from my drawings, I began scanning in my paper weaves and collages. I edited them slightly on photoshop then spoke to Neil about sublimation printing so I could quickly lay down my loose colour palette onto fabric and start manipulating. After printing my imagery, textures and colour out, I started carefully cutting and tearing using my drawings to guide me. I explored different polyester fabrics, some worked better and others made the colour more muted. This was due to the cotton content in the fabric. I am looking for fairly bright, true colours so I need to be mindful of what fabrics I choose to use. As I was just testing out this process today, I was using off-cuts of fabric but I will continue this on Monday and will buy the polyester jersey fabric, which worked well today. I really like the quality of my samples today, it has made me think further how I could develop this. I could further use weave/ structured elements by weaving fabrics yarns or papers, as I think my drawings look like they could relate well to weave. This actually was my planned sampling method- but I don't mind if things don't go as planned. I like how this process has just worked for me, just from a few small ideas from Jill's workshop on Wednesday.

I really liked the way one of the prints turned out when I layered the sublimation paper on the top of a previously printed piece, it was off centre and gave it a completely different quality. I originally wanted to re print it because I found the colours too pale (the heat press wasn't hot enough) I am so glad this happened because I discovered an interesting way of adding more depth to the print. I did think some of them did look slightly flat. I also began playing around with the fusible vilene which also could be printed on, it gave a really nice texture, I could even try fusing this to a cotton fabric so that I didn't have to use polyester??? I want to try to using other materials in the heat press- coloured tape or different yarn or mesh that might melt?

This weekend I plan to continue researching context and gather my sampling and materials to build up my research files, I also want to finish off my mood boards so they are ready for monday's session.


BA3a

PRINT OR WEAVE PRINT OR WEAVE

October 12, 2016

I have a good collection of drawings and ideas/research now but just unsure how to sample- is this partly because I am still not certain on my context?
Jills workshop today has helped me translate some drawing into print, it has helped me refine the shape and line in my work. Today has enabled me to think how I could further develop these mini samples i have quickly created from my drawings. I essentially see this samples as more drawings as I collaged the sublimation papers together and then transferred them onto fabric- I really like the results but I feel as if they need more texture to them.

 I could sublimation print with some of my scanned drawings, colours or designs on photoshop and combine collage techniques with these- also could try different materials to sublimate onto? Could melt materials with sublimation print?
I could also use weaving as a base for sublimation? I could weave polyester fabrics then print on top?- would I have to re warp my rigid heddle loom (currently has cotton warp)? what would happened if I had two different fibres in weaves?
I could weave with indigo warp and use log cabin technique to relate block colours and collage drawings?

I have a  lot of things to think about, I need to continue drawing and decide on my context in detail to then help me with my sampling options.


BA3a

Further thoughts

September 30, 2016

I popped over to the Forum to see Aviva briefly and had a chat about how my work was going, I was unsure where to go, weave, print, stitch? or all of them? Speaking to her made me realise I wasn't sure on my direction just yet, I haven't tried to explain it properly to anyone, its all jumbled in my head and doesn't make complete sense just yet. I went home and made various mind maps, trying to unpick my ideas and explore what it is that really interests me and how I am going to ask my self the question/learning agreement.
I read through the PDP building a project presentation from Les, and some of the questions helped me think about my project further. I have made a list of those questions and printed them out so I can use them as prompts for when I am struggling with reflecting or questioning my ideas. I prepared my studio space and stuck up inspiration images as I plan to use the studio as much as possible this year. I then went exploring Norwich with my camera handy. I walked around anglia square and ended up near the back of the car park, I was pretty high and ended up in a fab spot for photographs. I varied the shots, looking at the lines, grids and colour of buildings, walls and other unnoticed, unappreciated objects in te urban environment.
I had a play on photoshop, enhancing the colour and straightening them up and found my self loving the results. I just need to continue to draw from these and keep exploring the city with my sketchbook to make mark as drawing is the essential starting point! Hopefully this will help me decide on my sampling. Maybe its good not to know try intentions just yet?


Research Report

Research Report?

September 29, 2016

Writing isn't my strongest trait but I luckily am extremely interested in the topic I have chosen to explore. The session with Jill on Tuesday was handy, especially now being grouped with two other students writing their report on a similar topic, we shared ideas and created a whatsapp group to discuss more ideas when we aren't together. We have emailed Sebastian Owen about Brainchild and further meetings we can have with him as I have heard he is so willing to help! Tuesday was a wake up call and made me realise I need to get my self organised as I cannot afford to fall behind. 


I have booked a session with academic support the day before the optional draft hand in (which I am absolutely taking advantage of). This gives me a goal to work to and forces me to write write write!

I have emailed Amos Rimini and Ashley Goldberg to ask them questions about self employment as an artist but I am still awaiting a response from both of them. 

I am also thinking about speaking to Pete Mosely, who I have met before and would be willing to speak to me about creative business- I just need to work out what I want to know!!!

This week I plan to listen to a voice recording I took at New Designers from a lecture about creative business, I will then unpick it and find the relevant information. I also need to refine my question and start my draft intro!

SO MUCH TO DO SO LITTLE TIME!


BA3a

Mini ideas meeting with fellow course members

September 27, 2016

Meeting up with my other 3 friends on the course has helped me further extend my initial ideas form yesterday session. We discussed our ideas individually and gave feedback to one another. I explained how I wanted my design to be in a functional context and have a purpose. I showed my mini mood board of colourful buildings and it was suggested that I explored the theory of colour, thinking about mood in relation to colour. We discussed hostels, hospitals, children's bedrooms, sensory rooms and hospices. I like the thought of applying my work to a public area that can affect a variety of different people.

My fellow course members liked the idea of my drawing focus of urban architecture and colour, I just now need to decide my focus on sampling- do I want to solely weave or print or shall I combine  them (my favourite). Will I be stuck for time? I am not hugely experienced in hanking up yarn, dyeing, coning then threading up the loom in a short space of time so this might hinder me? However I like to challenge myself and weaving on my rigid heddle loom is something that works well for me and I can imagine my first few drawings transferring into weave already-something to think about!


BA3a

THIRD YEAR HAS BEGUN

September 26, 2016

I have been thinking about what I want to make/do/design/draw in third year all summer. I have been to London, visiting the exhibitions and museums with my housemate who studies fashion. We particularly gained lots of inspiration from the Missoni exhibition at the Fashion and Textile Museum, studying the colour combinations and history. I have also begun exploring abandoned areas and urban architecture, photographing colour and shape as well as recording using drawing line over collaged backgrounds. I want to further work on this using recycled papers and materials. 


Right now I am now super overwhelmed after todays session. I need to find a good interior context to apply my designs to that is interesting, fun and unique. Ideally I want my context to link strongly with my drawing/project focus and I want to have a powerful concept behind my designs. 

There are so many contexts I could apply my designs to which would be interesting and different... homeless- no interior?
hostel?
social housing?
exploring different culture?
community?
underfoot?
storage?- repetition?
transportable/portable?

I have been thinking about how I want my design to be applied to something functional, with a purpose, possibly life changing? I need to continue to think about the demographics of who would use the space, what the space would be used for and why? How big would the space be? does the outside inform the inside? could the design raise awareness

I have issued books from the library which explore varied interior designs, focusing on colour as well as composition, culture and tradition. 

WHAT NEXT? :

continue to look through interior design books, picking out what interests me and what is suitable to apply my work to?
explore norwich and draw from buildings/linear patterns and colour (and photograph)
explore dezeen/design milk/ design boom/ apartment therapy etc for more inspo 


A collection of my drawing focus so far


BA2b

Collab box presentation

April 21, 2016

Today we presented our boxes to the rest of our peers. When completing the box yesterday, we inserted the mask into the back of the box, and suspended our samples in front, layering the colours and textures of the materials. This means that our box is interactive, enabling our peers to look through the mask, seeing the layered hanging samples. This links well with the idea of identity, covering the face and eyes, removing identity. We also created a shelf for the side of the box, for the larger sampling which wasn't transparent enough for the suspending. We thought of the idea of having a "create your own skin kit", making it even more interactive, for our peers to actually pick out the sampling they preferred the most. We named our skin after combining the names of our group members together. We researched in to the layers of skin we have, realising they have names, like the epidermis etc. So we named it Nimaloje.
I was worried that our concept wasn't being put across well, maybe we should have had more text, explaining the story of the future events, which influenced our materials and designs. We transferred parts of our moodboard on to parts of our box to try to tell the story as much a we could.


Follow Amelia's board Fashion & Textile collab on Pinterest.

BA2b

Print Room fun

April 18, 2016


I have just got back from a long day meeting my Stagecoach group then spending time with my Fashion collab group to produce samples in the print room. I popped to the shops on my lunch break earlier to source and gather materials to to use in the print room this afternoon/evening. We agreed that I would take all the photographs on my DSLR camera to document our process and then I would share these with the rest of the group later on this evening.

We initially experimented with a mesh bought from Anglia Fashion Fabrics and fused it with an anti-slip material which melted together under the heat press to create a more skin like fabric. We experimented with melting and fusing in various ways, adding clear PVC, melting two fabrics together then going back in again and trapping them in PVC etc. We liked the idea of covering the hand, face, mouth and eyes for our concept so we thought we could try out best to make a hand covering or glove out of the fabrics we were creating. Unfortunately the fabric wasn't stretchy enough and we had trouble turning the glove inside out to the right way after sewing it together. Nina then started using the dye kitchen wondering if she could dye some of the latex gloves. She had an array of skin tones bubbling away and we all spontaneously dipped materials in, like the anti-slip material, tights, PVC, the mesh from Anglia and some textured wallpaper. We continued to combine process and managed to build up a good selection of material tests and samples which I photographed, layering and changing composition.

Initial melting of the two fabrics
Before we realised it was impossible to turn the glove the right way round. I think the idea is still nice though!  
Experiemtning with the idea of identity in the future, covering the mouth and encasing the mask in nude tights

A peachy coloured plastic poncho that we used to replicate our concept for the future

Sampling with the antislip fabric and PVC

Dyeing the anti-slip fabric 

Dyeing the latex gloves 
Dyeing vinyl fabric- too orange maybe?

Our work space! Taking over the table!!!

Dyed latex glove


A selection of my favourite samples

Layering similar samples

Layering and playing with composition 

I had bought some white silicone in a tube from pound land earlier on so i played around with it, applying it on to PVC and onto fabrics. It dried fairly quickly and did exactly what we hoped!!! It created a skin type texture and quality so I planned to go home and add some gouache to add colour and then continue to apply this to materials.

Experimenting with the silicone
Applying silicone to tights, plastic and PVC. I made texture using the mesh and anti slip fabrics by pushing it through the holes with a spatula. 


Now that I am home, I will continue to play around with PVA glue and UHU all purpose glue to create a transparent resin like material. I want to trap in colour and trap texture in to further replicate our concept of a second skin.