Group Repeat Print Project

PRINTING DAY

October 20, 2015

Today my group printed our repeat pattern. We set up the stoppers, t-bars and repeat distance which was faster and easier than I anticipated. I feel like I have learnt a lot about time management and working under pressure today as well as learning about the basics of repeat screen printing.


Working as a team was another skill that I felt that I built on. In our group there was 4 of us which worked well when holding the screen and moving the squeegee across the screen. We evolved a system which worked well; we all mixed up one dye colour (which we had learnt to do when testing our colours a couple of weeks ago), we would take it in turns to pour the dye on to the screen, hold the squeegee and turn the hair dryers on to dry the print whilst others washed the screens. I think this is how we managed to get our print done in such good time. We managed to finish it in 5 hours which meant we had enough time for our individual colour ways. I was unsure whether I would get this done in time today because our table was booked by third years from 5 o'clock onwards. This would have meant I would have had to get our screens re exposed at a later date, luckily this was not the case. Whilst our length was being steamed we worked on our individual colours.

Group 3 metre repeat print.


I was still unsure on my colours because I had tested them out last night and was unhappy with the way they over layed each other. I had an idea of changing the layers about, I started thinking about the colours too much and was adamant the bee on our design should be yellow. I decided to change around the colours of the layers and I found that it worked quite well. Instead of sticking to the same kind of colours (for example keeping a yellow tone on the original yellow screen with the bees and flowers) I completely changed my way of thinking to make a more investing abstract print. I really love the way this has turned out and I would love to experiment more. Unfortunately there was limited time and we could only have our large group screens for the one day but the kodatraces will be kept so I can use them to create another screen to try out and experiment with unique colour combinations. I recognised that the colours of mine and my peers prints really changed the way the print looked. Prints with bolder colours really stood out to me and were much more striking.
Whilst mixing up my dyes for my individual colour way our 3 metre group print came out of the steamer and was ready to wash. Unfortunately the yellow on our print had speckled because the dye had not dissolved properly, we did try to overcome this by blending up the dye to break down the particles, we tested the dye. unfortunately is was only when the fabric was steamed, the speckles formed. This is an issue that probably could have been resolved by boiling the dye up too. Luckily, I found this out just before i printed my own colour way (which was using a similar yellow) I boiled up the dye on the hop and then blitzed it up with he had blended just to make sure!


My own colour way


Trying to prevent speckling in the yellow dye by dissolving the powder up by boiling and blending.

If I could do this again I would have filled the print up more so there were less spaces, using block colours as backgrounds behind drawings and using more abstract mark making drawing. Being part of a group meant that everyone had to input their ideas which meant not everyone's ideas were listed to entirely. Group work has taught me many things and I feel more confident and happy to be part of a team again.


Repeat print

Geo Print Illustrator: Technical

October 19, 2015

Quick visual research using pinterest and WGSN in preparation of our session with Robert


                                                                                                                                                                                                 Textiles Première Vision Designs S/S 16 – Print & Pattern 02.19.15 ... Première Vision Designs S/S 16 – Print & Pattern Retro Geos S/S 16 Textiles By Product Category ... are revived with retro geometric patterns  inspired by 1960s and 1970s fashion prints. Tricolour geos ...                                                                      


Further research of Mid century Geo prints, looking at Anni Albers' work. She was an American textile artist and printmaker. She produced tapestries, wall hangings, print works, wall covering designs and woven samples.
http://www.moma.org/collection/artists/96?locale=en
http://www.wgsn.com/content/board_viewer/#/138030/page/1


Using Robert's worksheet was helpful because I hadn't used Illustrator much before. I found it so simple to use and I can apply this skills I learnt today to further digital print work or designs created from my original work etc. I am so excited to do this- I just need to find some more time!!


colour

Mini test screen printing session

October 06, 2015

Our group decided to trial out our print using our colours. We created a mini kodatrace collection for the 4 different colours. We found out different problems that occurred and were glad that we tested it out before the final 3 metre print on the 20th. We found that the colours work quite well, although they do not overlay to make a new colour (like yellow and blue would overlay and make a green) but not much overlaps anyway. They do not make muddy colours anyhow. We discovered that the flowers had a lot of fine detail which meant that the detail was lost when the dye was applied, the dye also bled a lot. This could have been down to the amount of pulls we did with the squeegee but we have adjusted our print design just in case. We changed the amount of lines we have in the flowers as the lines just merged into one 'splodge' of colour and the yellow block colour underneath was not visible. The line detail will be finer and more considered. 


Group Repeat Print Project

Finishing our repeat print design

September 28, 2015

On Friday we had trouble with the placement of our design, we agreed that we would individually work over the weekend to create less drawings but duplicate them in different sizes. This would mean that there were less variation of different drawings and less busyness of large objects. We had difficulty with large drawings that had thick lines as this would mean the repeat would be obvious and visible once it had been printed. 


Group Repeat Print Project

Print Group 5 Discussions

September 24, 2015

In our group, we are drawing individually so we can combine our drawings together, we will temporarily stick drawings down so we can create a mock design and change compositions. As a group, we have decided that we will draw from objects that have interested us over the last few days that link to a loose theme of nature.

- Lauren: jewellery, flowers,
- Amber: bees, honeycomb/nests and leaf printing
- Me: dreamcatcher feathers, shells
- Shiv: cactus texture, shells

We think the contrast between Lauren's geometric flowers and my marks from feathers and shells will look considered and interesting.
Using a combination of drawing strategies is really helping me create different marks. Drawing isn't my strongest skill but I find that working large and loose helps me with considering shape, line and texture.  Observational drawing has worked extremely well for me as I feel the pen does the work for me whilst I look at the object in detail (I need to use this technic throughout the year!).


TO DO:
Scan/photocopy/enlarge real honeycomb/bees nest and transfer that to tracing paper or kodatrace
Create a mini mock up of repeat design tomorrow (combining everyone's drawings)
Look into colour palettes as a group


Group Repeat Print Project

Kodatrace refresh

September 23, 2015

We were reminded as a group on how we can creatively apply line and shape to kodatrace in a quick 1 hour session. This helped me and reminded me how it doesn't just have to be black fine liner or chinagraph pencils.


Materials to use:
  • Photo opaque (variety of brushes and mark making tools)
  • Black paper
  • Posca pens
  • Oil pastel (rubbings/resists)
  • Graphite (rubbings)
  • Stitch with black thread
  • Lace/fabrics
  • Chinagraph
  • Acrylic paint
  • Hole punched paper

Alternatively to Kodatrace we can use tracing paper which is a cheaper option and still works in the exposing process. In this workshop we used both tracing paper and drafting film(Kodatrace). I found that the tracing paper did curl and crinkle a lot so I will only use this for drafts or mock up screens.


Group Repeat Print Project

Cut through repeat workshop

September 22, 2015

We began this workshop with drawing activities using our personal objects to draw from on A1 paper, using many drawing strategies:
Negative space
Texture
Line/shape
Tone/shadow
Blind drawing
Continuous line timed drawing

Using a variety of drawing strategies is really helping me find a style and forcing me to use different scales and unique techniques. I enjoy timed drawings to then subsequently add and work into them to create more considered, delicate marks. I want to build a sketch book using these techniques, layering different drawing techniques with tracing paper, acetate and contrasting textures.

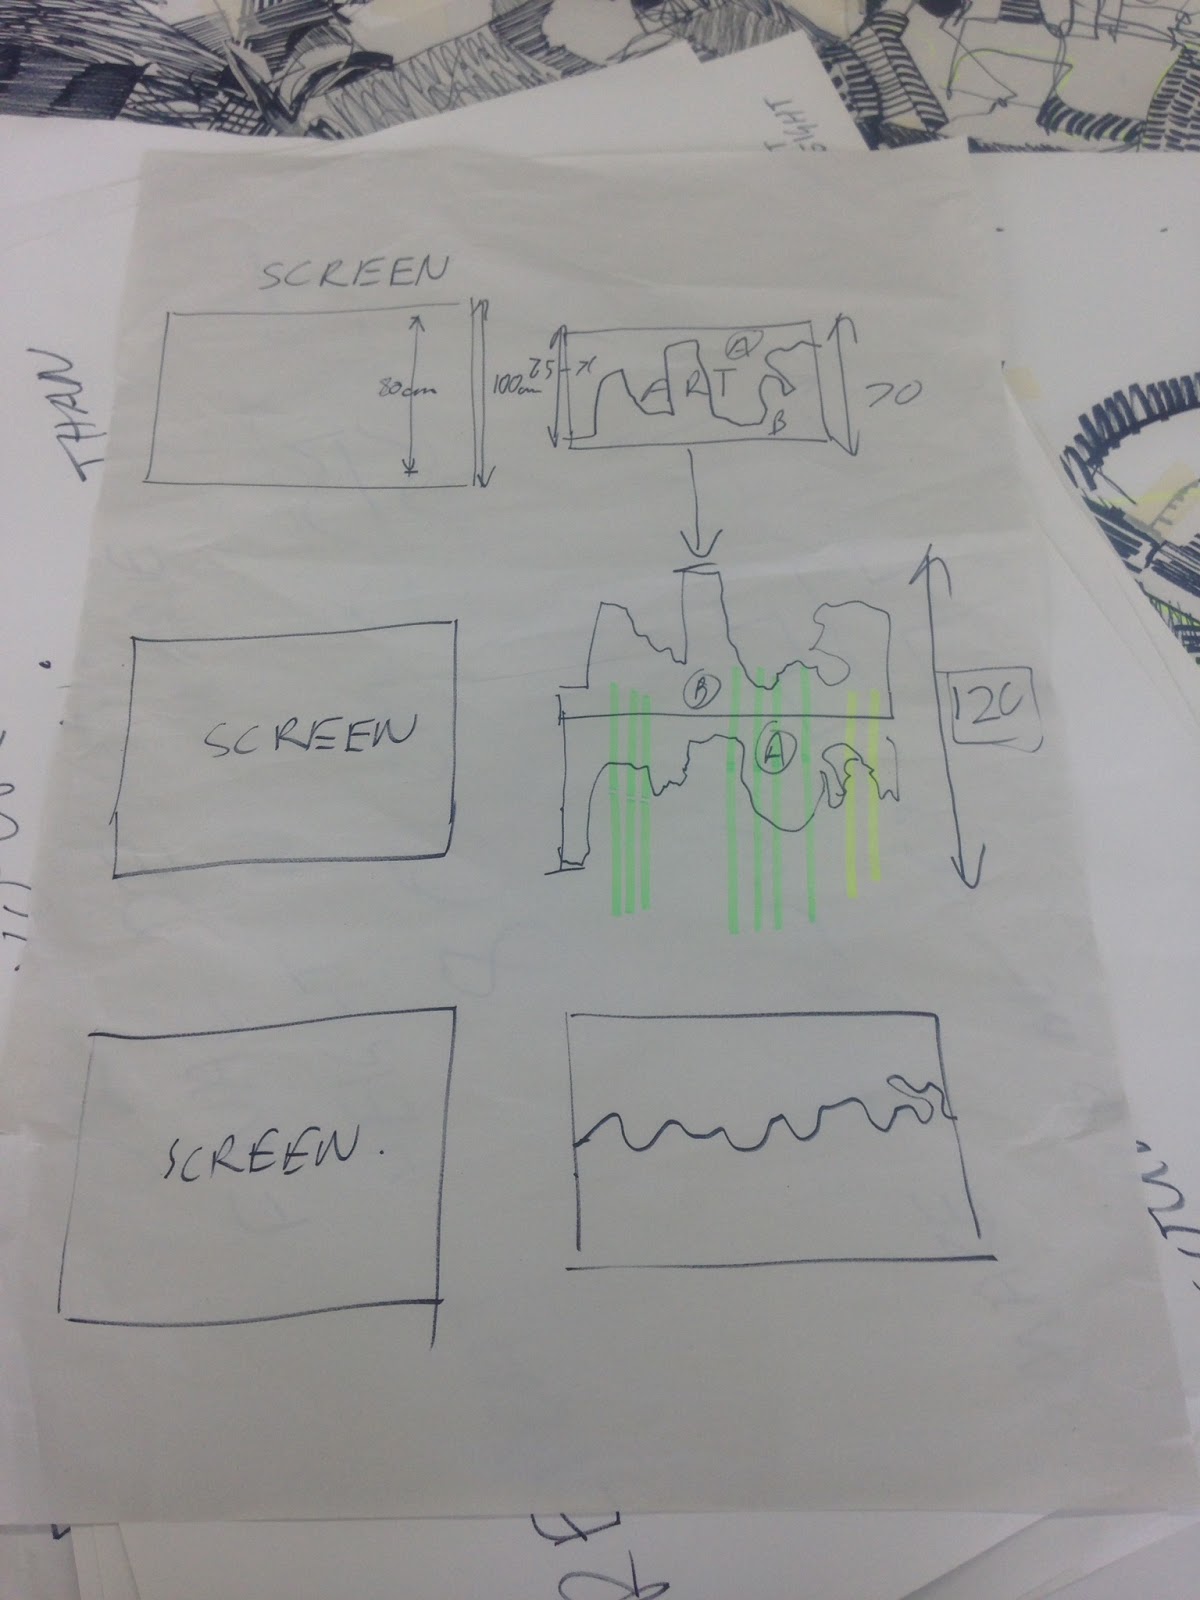
Today we combined the groups drawings we did individually with bold black pen using different strategies to create a large A1 collage of line and shapes etc, filling in spaces with and marks from our objects to ensure it flowed. We then cut through the A1 collage in a wave. Ensuring the wave was not too dramatic or high to create the subtlest repeat as possible.


Make a Repeat Pattern in 60 Seconds

Make a Repeat Pattern in 60 Seconds with Julia RothmanFull Class → http://skl.sh/repeat-patterns

Posted by Skillshare on Friday, 16 October 2015